
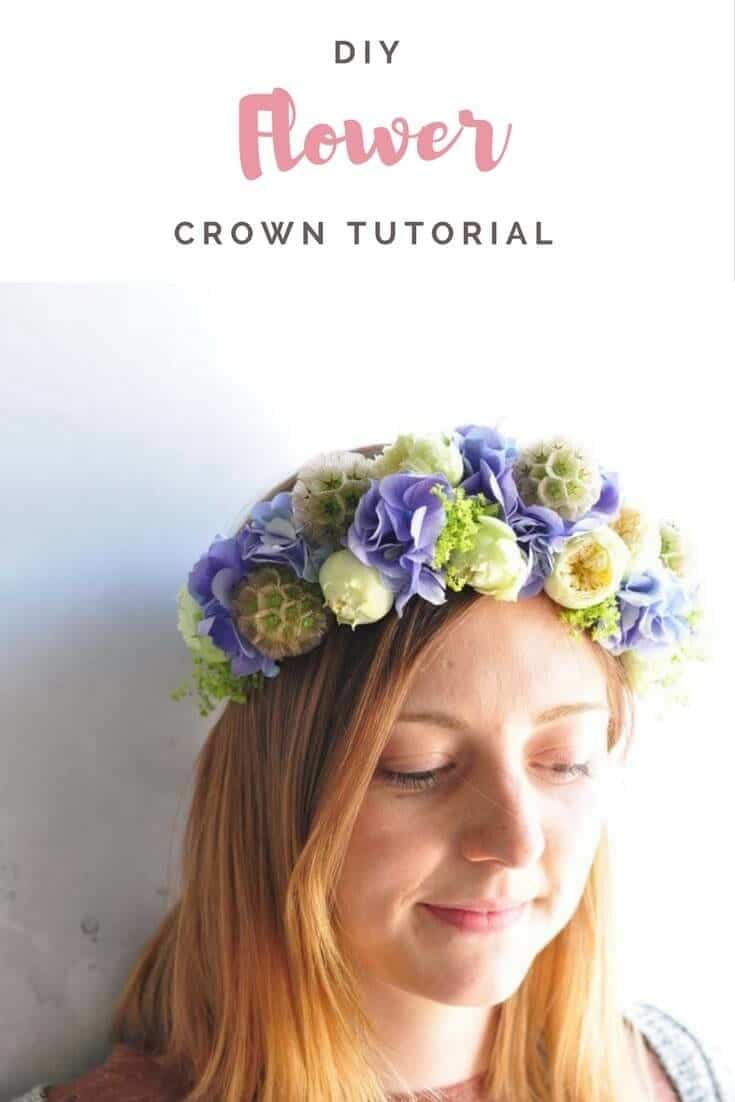
Summer to me is always a celebratory time of year. We’re done hibernating and want to get out there and socialise. BBQ’s, weddings, festivals …dancing! I hope I’m setting the scene! Come rain or shine, summer is about channelling your inner hippy – colour, loose clothes AND, in my humblest opinion, flowers in your hair!
Our DIY Summer Flower Crown Tutorial will have you reaching for the scissors and whipping one of these beauties up in no time at all – perfect if you're about to slip out to a festival, informal gathering or wedding!
Step one
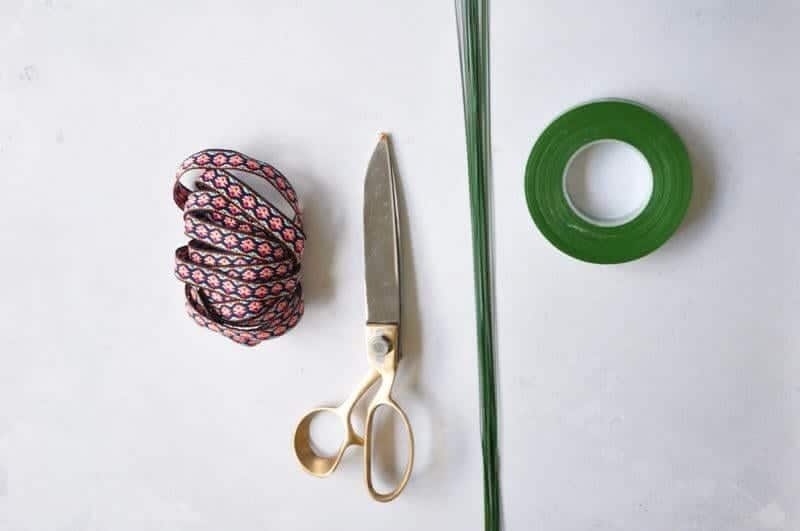
The tools of the trade
The great news is you don’t need loads of floristry gubbins to make your crown:
• some sharp snips
• some wire (floristry or garden wire will do the job)
• around 1m of decorative ribbon
• some floristry tape, which you can easily get hold of at most florist shops or craft stores such as Hobby craft
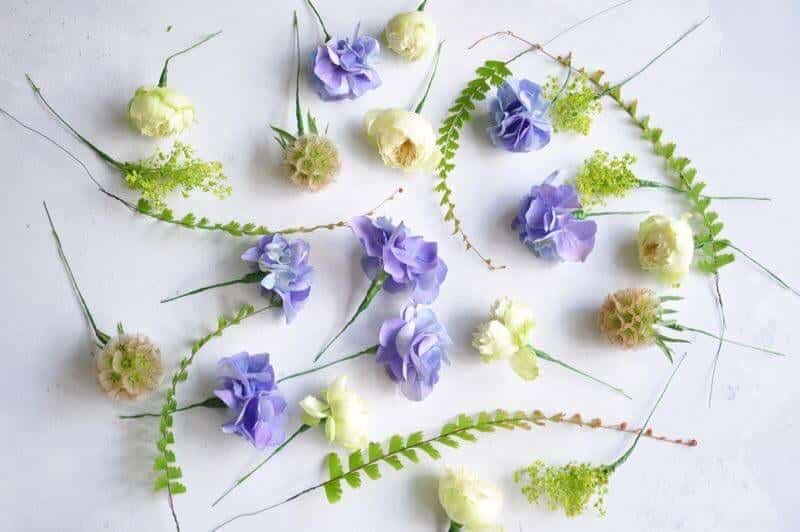
Step two
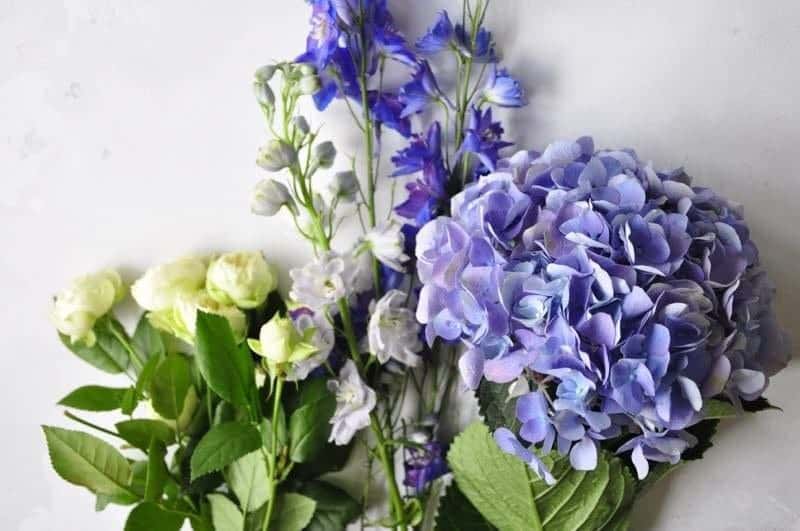
Choose your flowers
This is where the fun really kicks in – this is your crown and you can customise it however you like – go bold or go home, stick with more of a pastel affair … the choice really is yours!
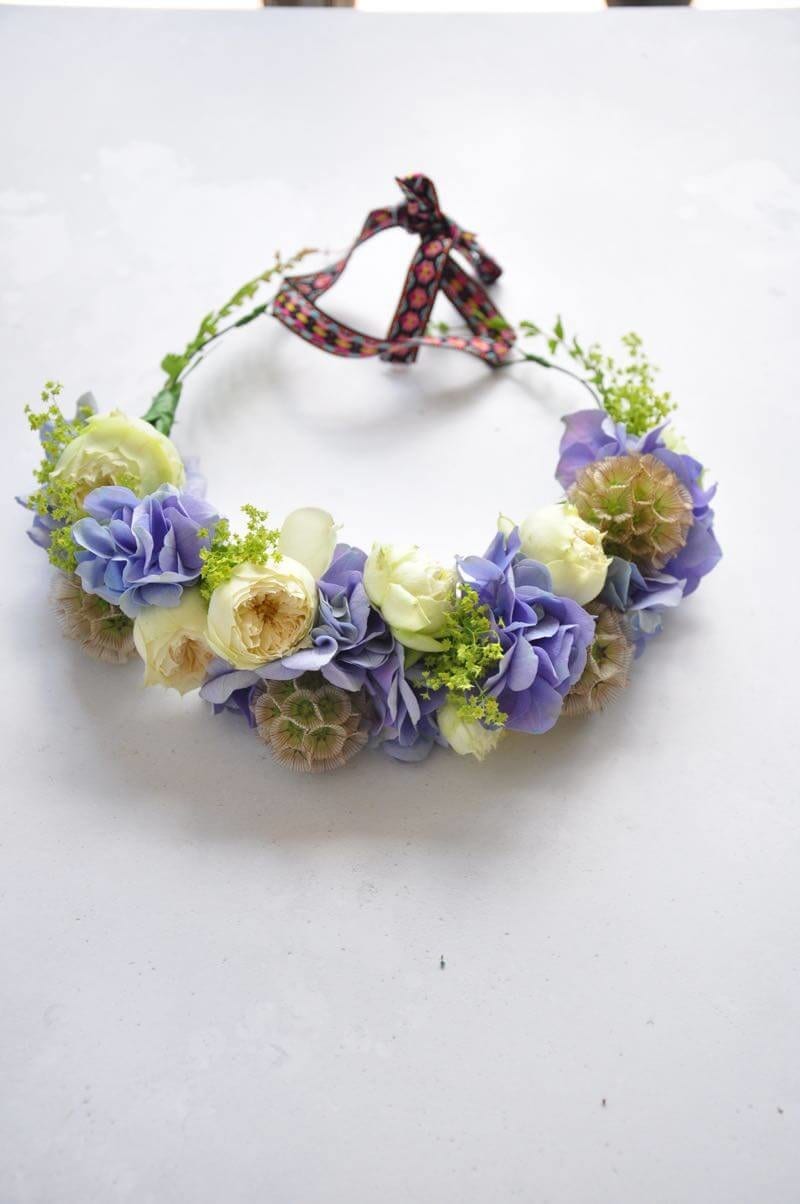
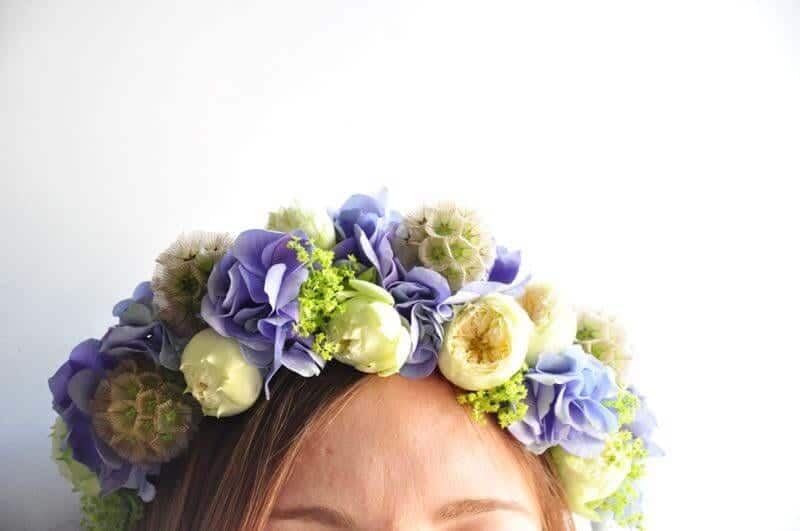
For our crown we used:
• 1 hydrangea head
• 5 stems of Blanchette spray roses
• 6 scabiosa heads
• 4 stems of alchemilla mollis
• 4 stems of bronze fern
Step three
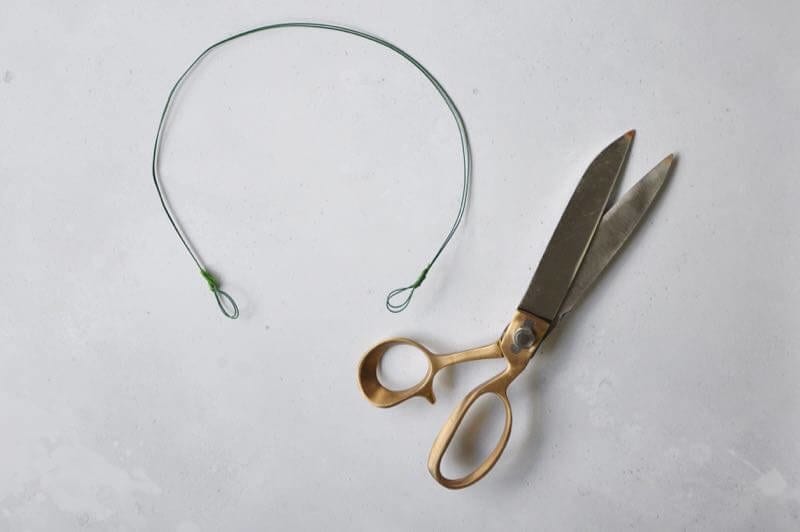
Shape the base of your crown
All you need to do is place the wire on your head and bend it into shape. It doesn’t have to go all the way around, in-fact I personally prefer it if there is a break because I love adorning with decorative ribbon. It also feels a little bit more informal.
Bend two loops at the base of the crown – this is where eventually your decorative ribbon thread through.
Secure all sharp ends with floristry tape.
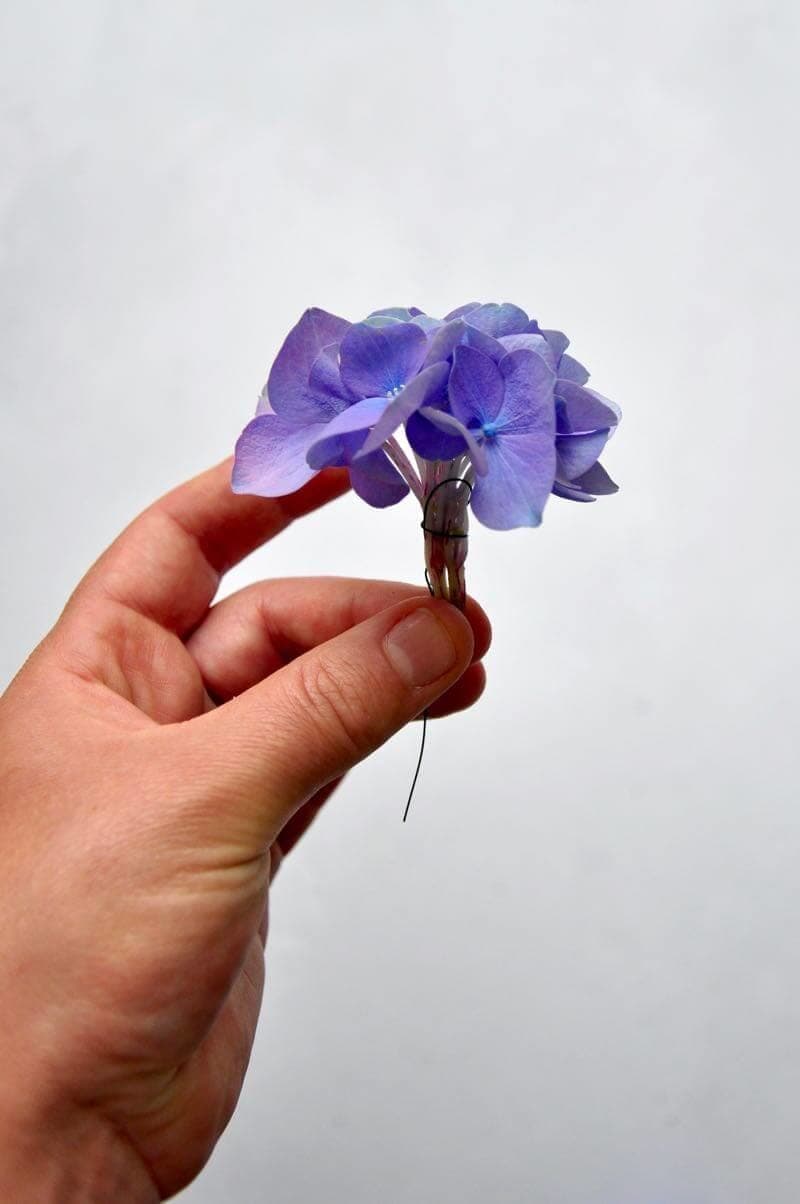
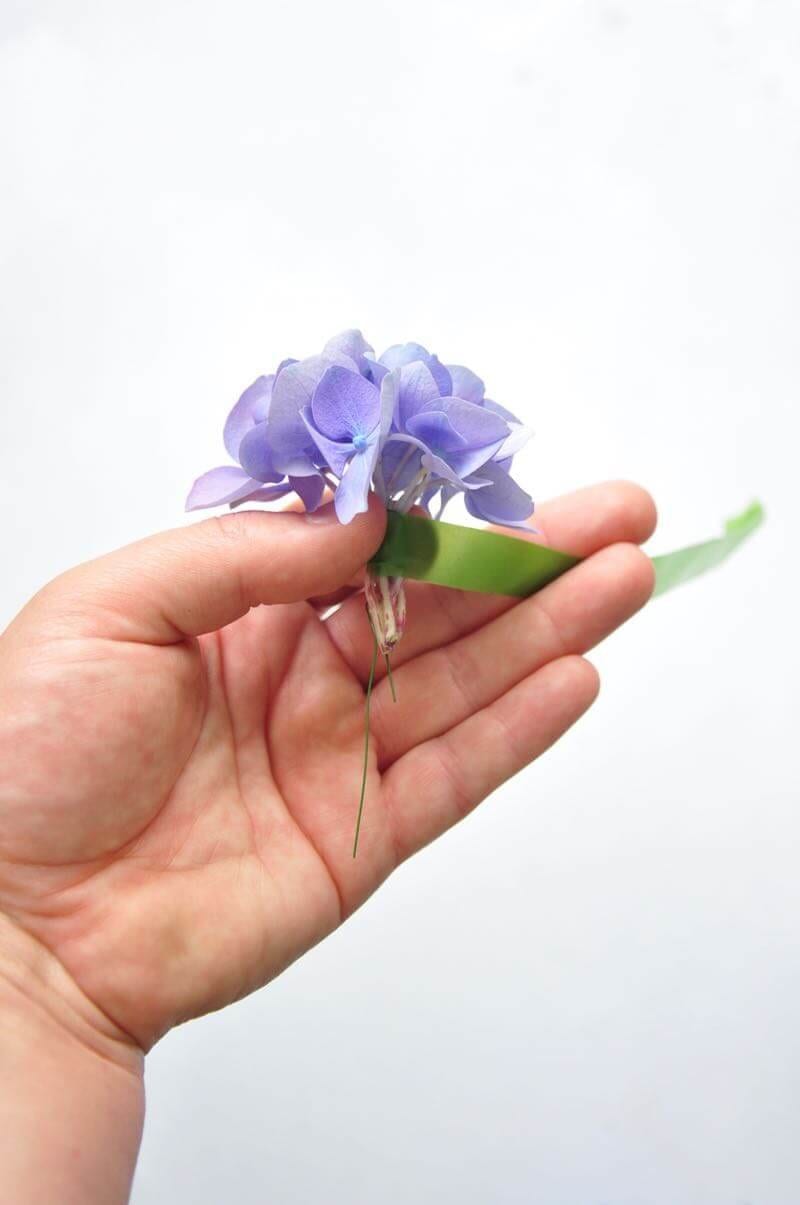
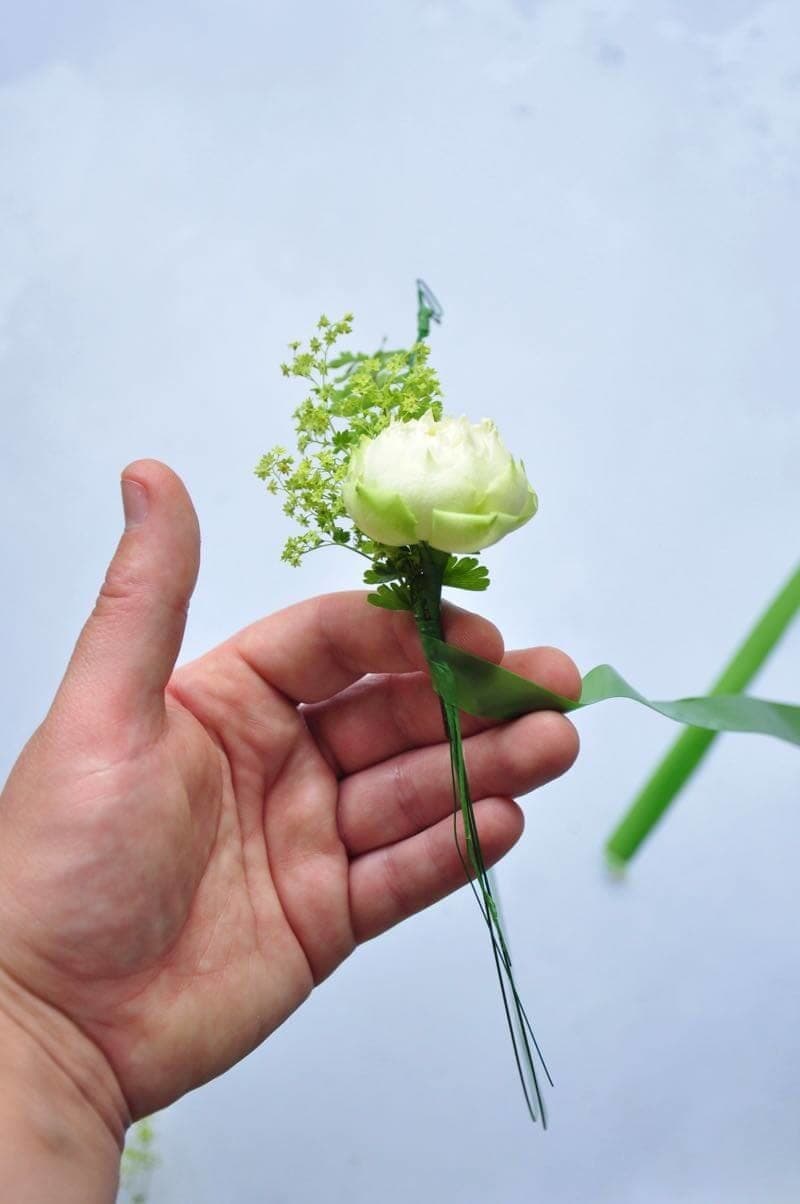
Step four
Wire your flowers
You want to keep your crown lightweight otherwise you’ll be taking off your handiwork before everyone's had a chance to comment on how super you look. To get this lightweight feel we need to wire the flowers. Effectively were make a flexible stem that is thinner and more malleable than the actual stem. The first few times you wire it may feel a little fiddly, but you’ll be wiring like a pro in no time!
• Cut your flower head reasonably near the base of the flower.
• Bend a small piece of wire into an ‘n’ shape, with one end of the ‘n’ longer than the other.
• Hold the wire against the flower stem and gently wind the longer piece of wire around the flower-head and the shorter wire.
• Stretch out your flower tape and wind around the flower and the wire.
• Repeat for all flowers!

Step five
Assembling your crown
You want to start gathering small bunches of flowers together and holding them against your wire base. You want to start right by one off the loops, with your flowers pointing towards them. Hold the flowers onto the base and tape them on using your floristry wire.
Repeat, layering each group of flowers on top of each other.
Note: I tend to leave around a 3cm gap between each group of flowers, to stop the crown getting over-full!
Step six
Tie the ribbon
Simply thread your ribbon through the loops to make your band adjustable and give a quick mist with water! VOILA! Your hairpiece is ready to wear!
Step seven
VOILA! Your DIY Summer Flower Crown is ready to wear and should stand up to the most vigorous of dancing!
We'd love to see your crown attempts to please tag us on on Instagram or Facebook
Instagram #greenparlour


