
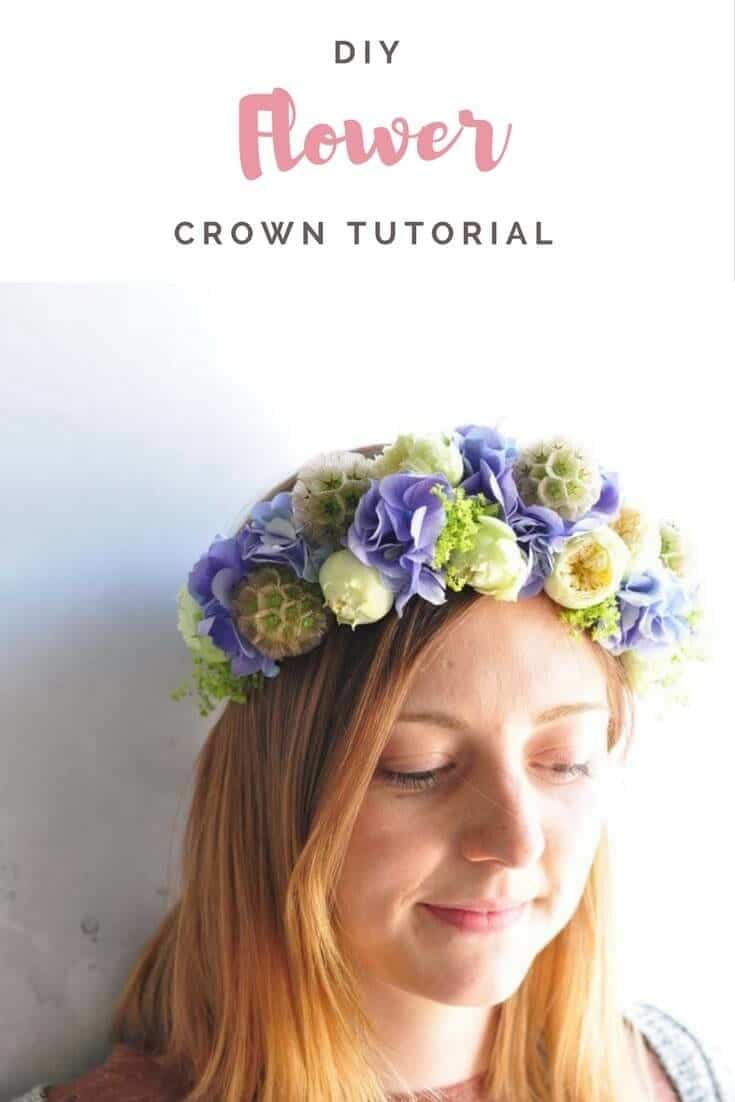
Summer to me is always a celebratory time of year. We’re done hibernating and want to get out there and socialise. BBQ’s, weddings, festivals …dancing! I hope I’m setting the scene! Come rain or shine, summer is about channelling your inner hippy – colour, loose clothes AND, in my humblest opinion, flowers in your hair!
Our DIY Summer Flower Crown Tutorial will have you reaching for the scissors and whipping one of these beauties up in no time at all – perfect if you're about to slip out to a festival, informal gathering or wedding!
Step one
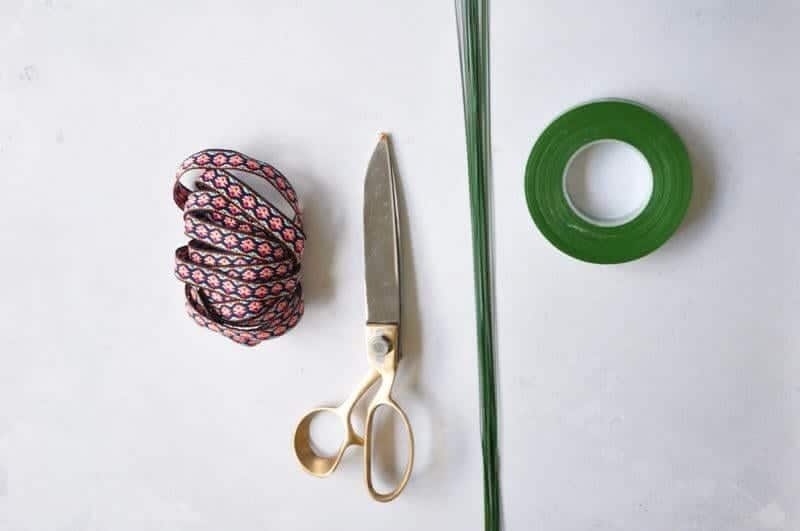
The tools of the trade
The great news is you don’t need loads of floristry gubbins to make your crown:
• some sharp snips
• some wire (floristry or garden wire will do the job)
• around 1m of decorative ribbon
• some floristry tape, which you can easily get hold of at most florist shops or craft stores such as Hobby craft
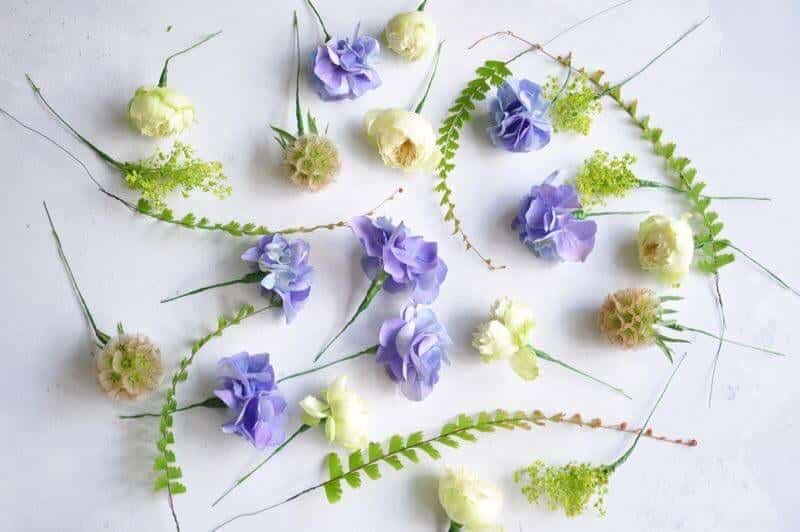
Step two
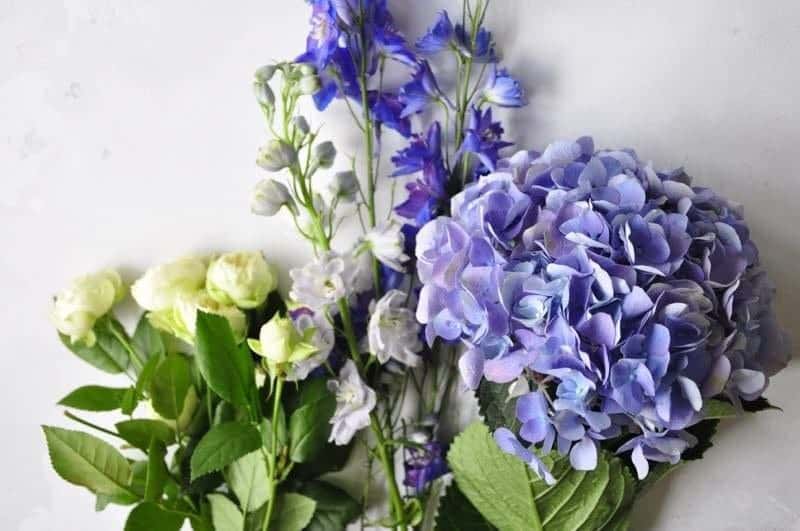
Choose your flowers
This is where the fun really kicks in – this is your crown and you can customise it however you like – go bold or go home, stick with more of a pastel affair … the choice really is yours!
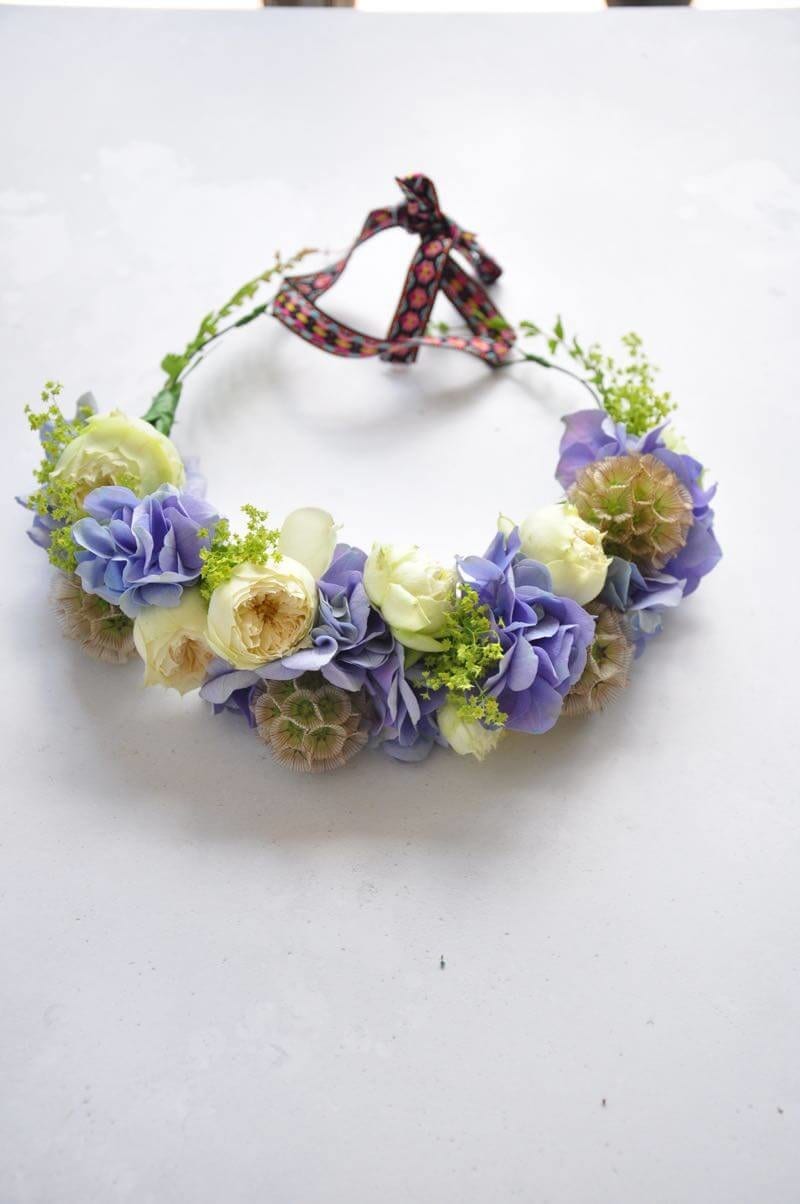
For our crown we used:
• 1 hydrangea head
• 5 stems of Blanchette spray roses
• 6 scabiosa heads
• 4 stems of alchemilla mollis
• 4 stems of bronze fern
Step three
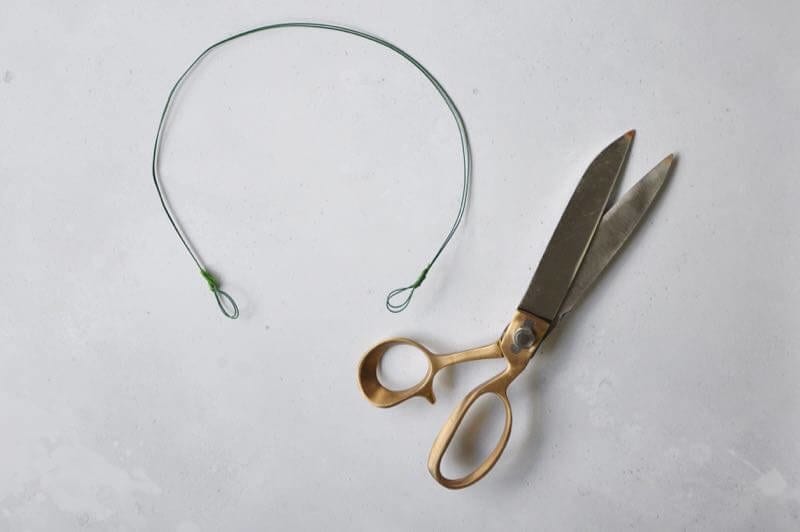
Shape the base of your crown
All you need to do is place the wire on your head and bend it into shape. It doesn’t have to go all the way around, in-fact I personally prefer it if there is a break because I love adorning with decorative ribbon. It also feels a little bit more informal.
Bend two loops at the base of the crown – this is where eventually your decorative ribbon thread through.
Secure all sharp ends with floristry tape.
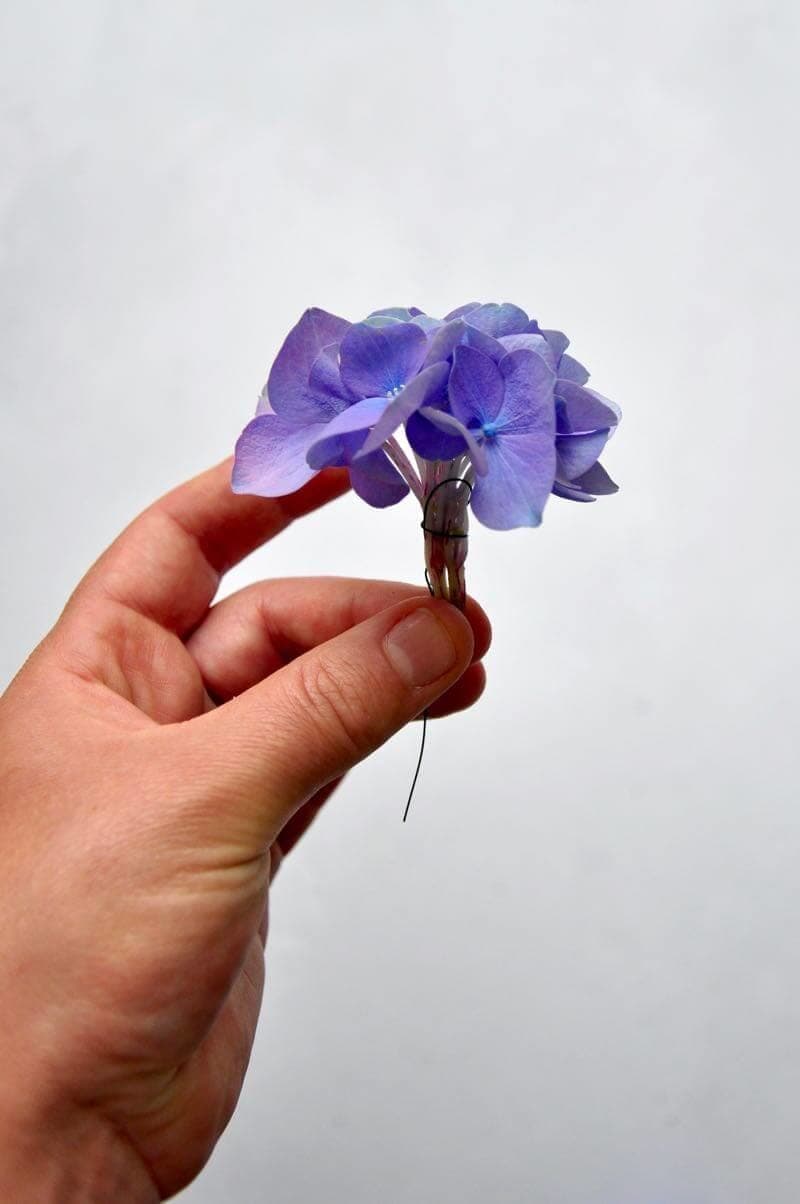
Step four
Wire your flowers
You want to keep your crown lightweight otherwise you’ll be taking off your handiwork before everyone's had a chance to comment on how super you look. To get this lightweight feel we need to wire the flowers. Effectively were make a flexible stem that is thinner and more malleable than the actual stem. The first few times you wire it may feel a little fiddly, but you’ll be wiring like a pro in no time!
• Cut your flower head reasonably near the base of the flower.
• Bend a small piece of wire into an ‘n’ shape, with one end of the ‘n’ longer than the other.
• Hold the wire against the flower stem and gently wind the longer piece of wire around the flower-head and the shorter wire.
• Stretch out your flower tape and wind around the flower and the wire.
• Repeat for all flowers!
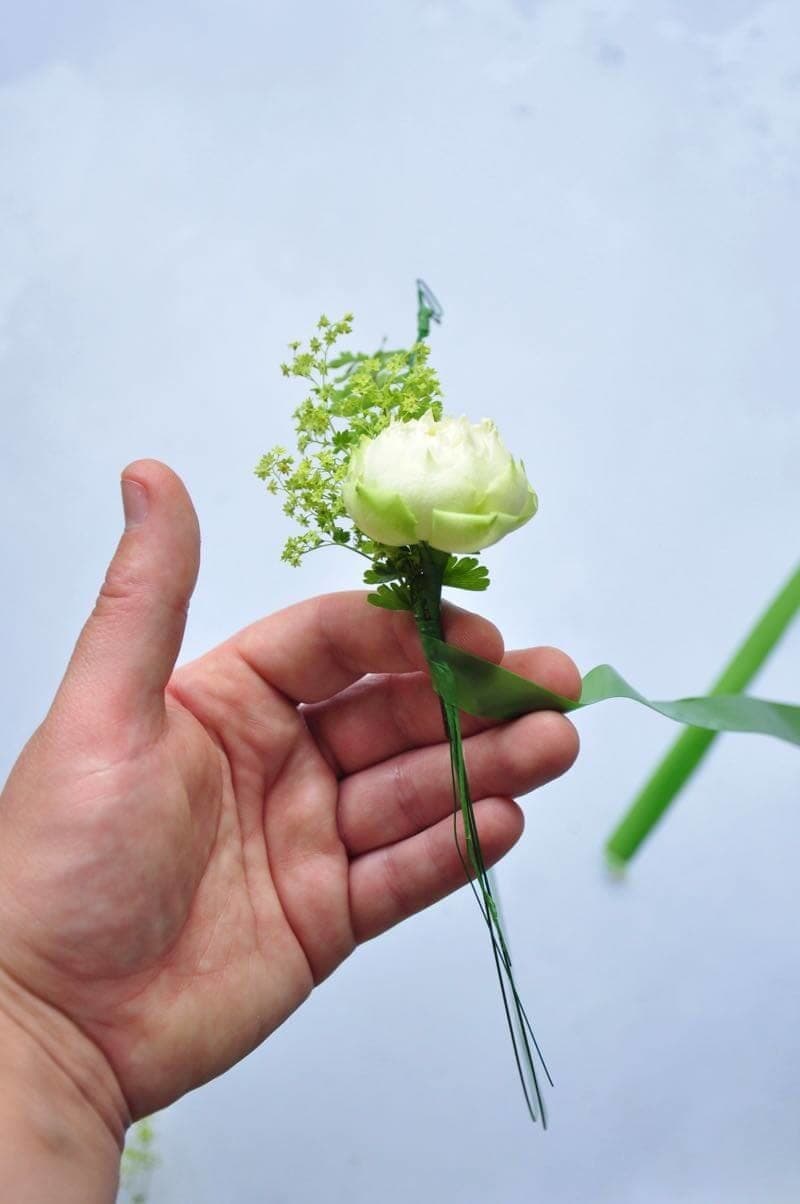

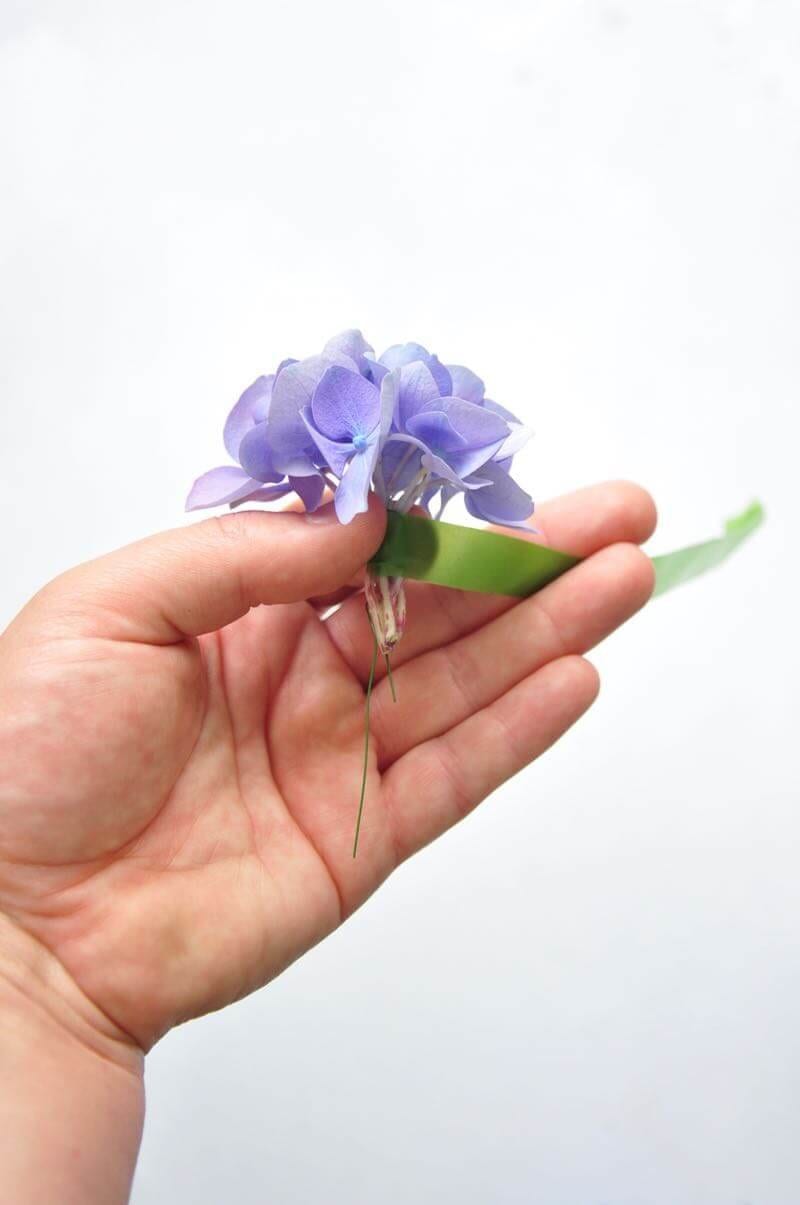
Step five
Assembling your crown
You want to start gathering small bunches of flowers together and holding them against your wire base. You want to start right by one off the loops, with your flowers pointing towards them. Hold the flowers onto the base and tape them on using your floristry wire.
Repeat, layering each group of flowers on top of each other.
Note: I tend to leave around a 3cm gap between each group of flowers, to stop the crown getting over-full!
Step six
Tie the ribbon
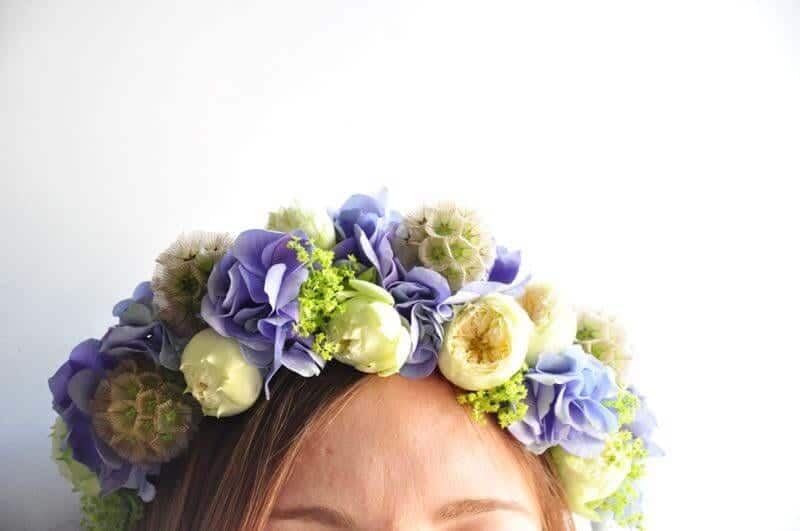
Simply thread your ribbon through the loops to make your band adjustable and give a quick mist with water! VOILA! Your hairpiece is ready to wear!
Step seven
VOILA! Your DIY Summer Flower Crown is ready to wear and should stand up to the most vigorous of dancing!
We'd love to see your crown attempts to please tag us on on Instagram or Facebook
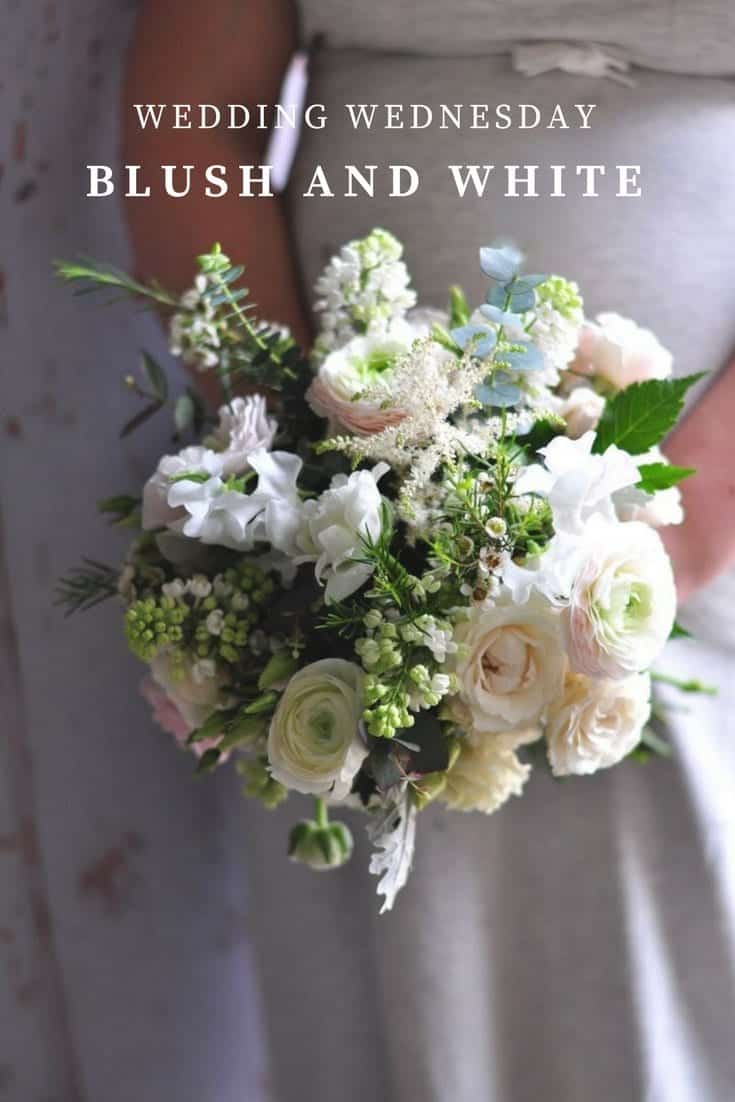
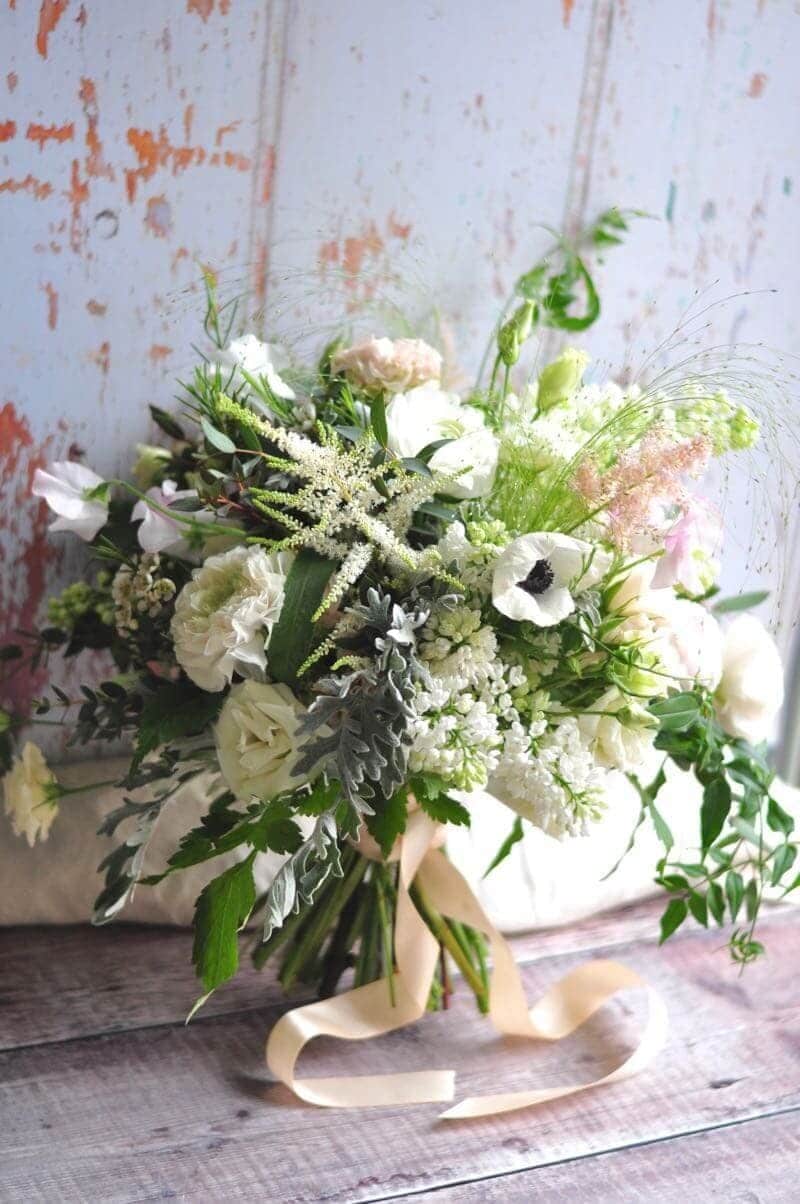
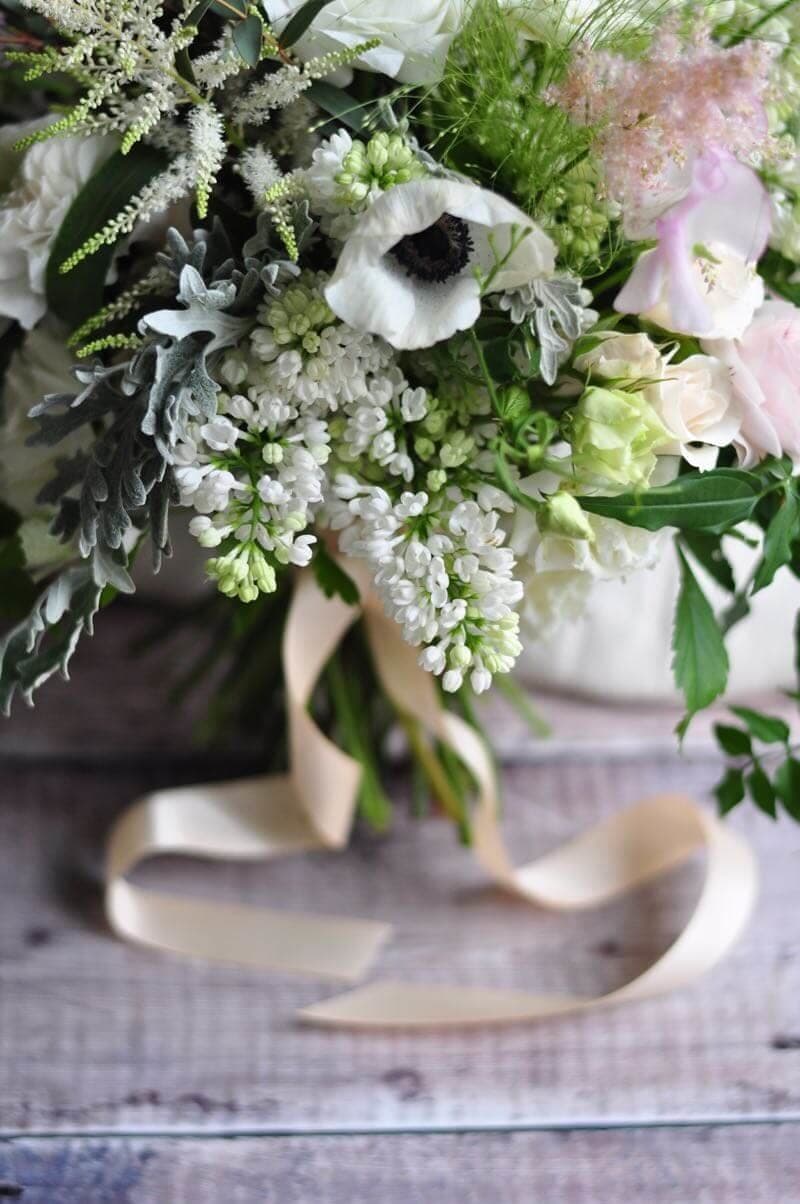
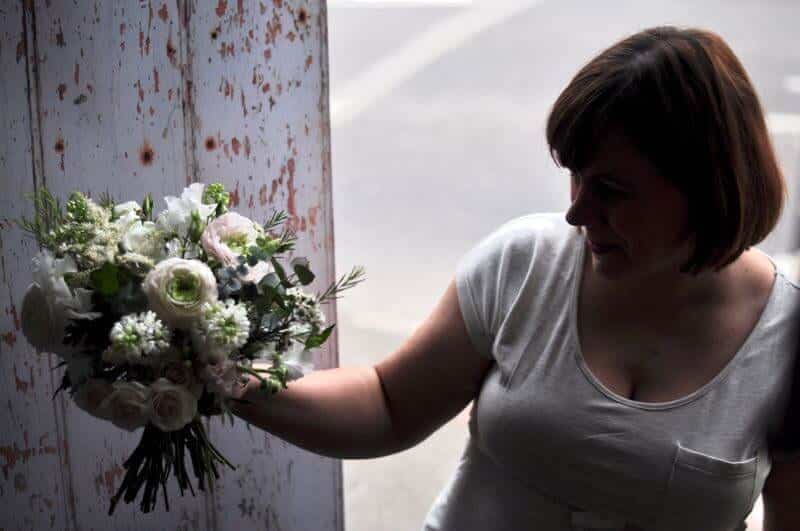
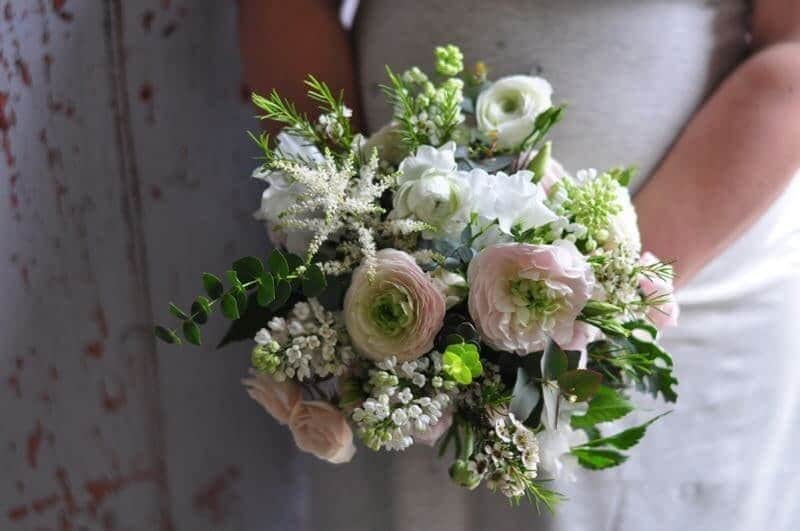
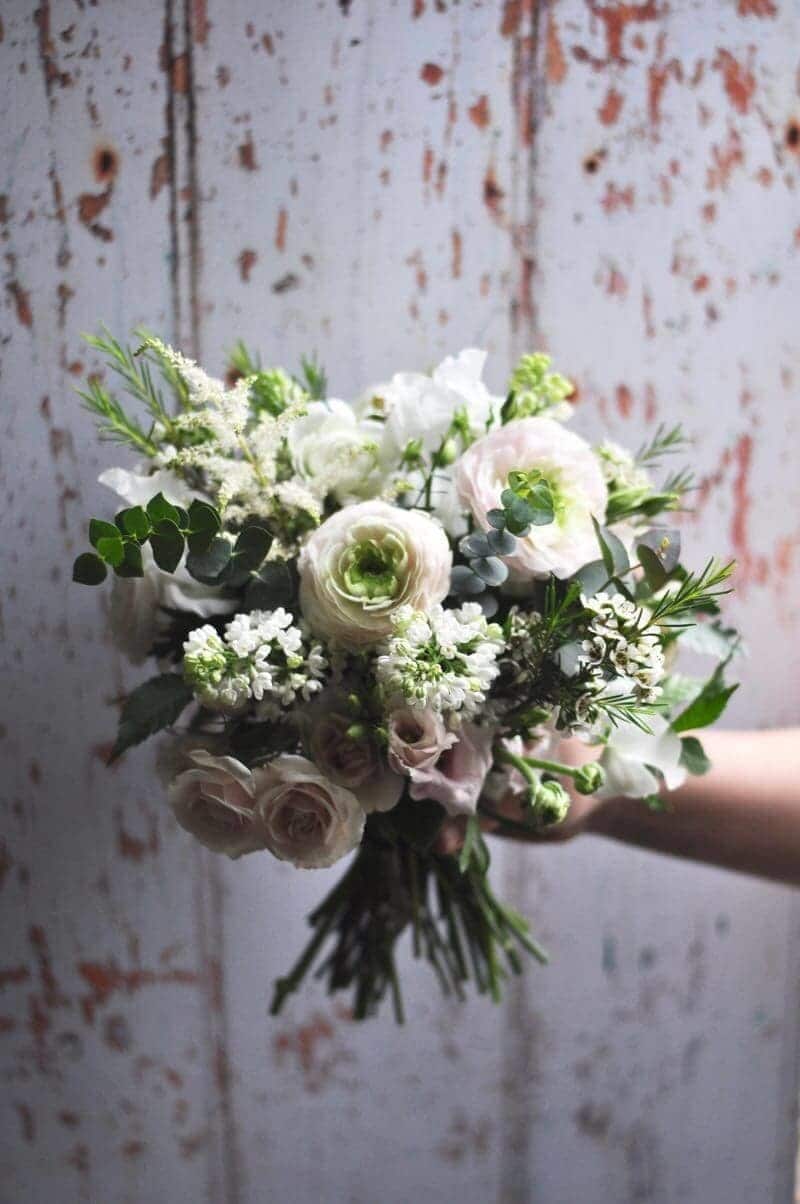
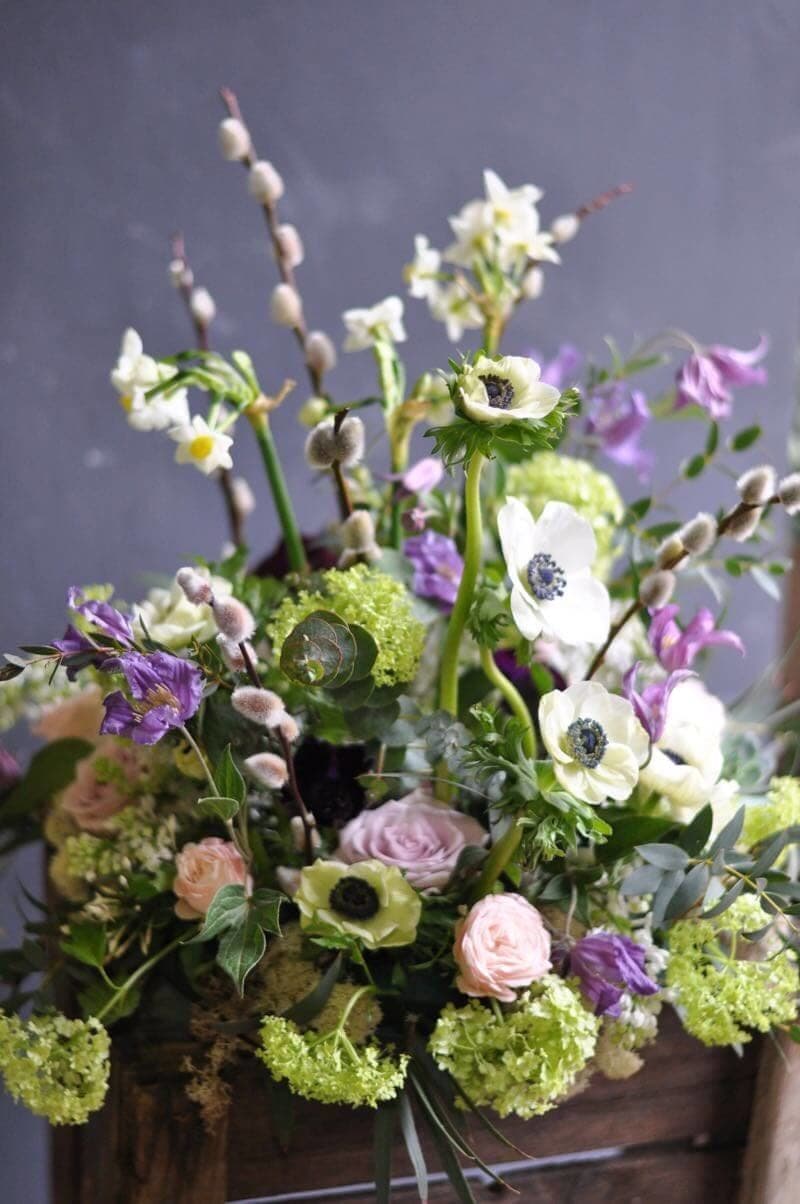
Blush and white wedding flowers are a timeless colour palette that will never go out of style. It strikes the perfect balance—soft and romantic without being too sugary, with just the right touch of pink to keep things sophisticated. It’s like the perfect love story translated into hues: tender yet with a hint of elegance.
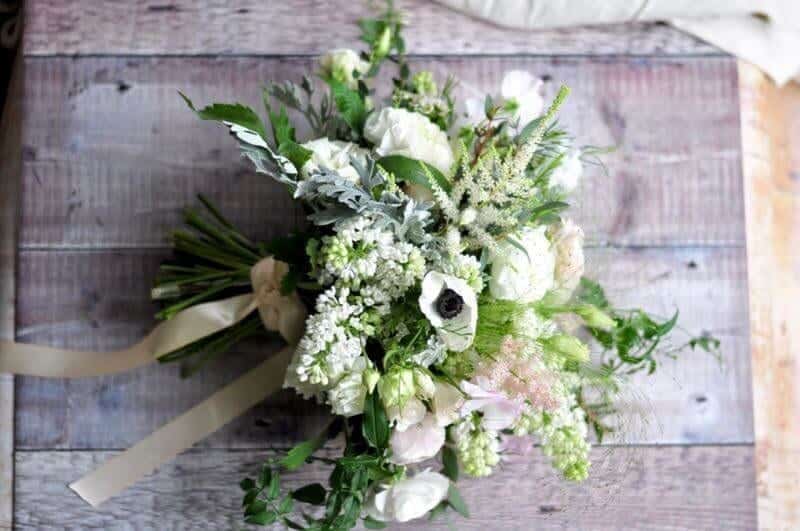
Louise and Lewis tied the knot at the stunning Wasing Park in April. The flowers were a seasonal affair, a perfect match for this beautiful venue. Louise gave us the creative freedom to go all out with the florals, and we truly embraced the opportunity. In true Green Parlour style, we used a dreamy mix of ranunculus, blousy roses, the last of the season's anemones, lilac, jasmine trails, and soft astilbe. It perfectly captured the essence of spring—wild, abundant, and naturally beautiful. The mix of textures added depth, while the delicate plumes of fountain grass brought movement to the designs. And, I must admit, I couldn’t resist sneaking in a few sweet peas—market day had some gorgeous blooms, and it would have been rude not to!
What I love most about working on bridal florals is the freedom to play with the flowers, subtly adjusting to create the perfect look. Louise was an absolute dream to work with—she trusted me completely, which made it easy to bring her vision to life. From our first meeting, I knew we were on the same page. Trust is everything when choosing a florist, and it’s just like buying a house—if you get a good feeling from the very first interaction, you’ll know they’re the right fit. Price matters, but that connection is essential. After all, your florist is interpreting your vision, so it’s vital that you're both aligned, with no lingering doubts.
For those who have visited Wasing Park, you’ll know it has an elegance that needs little embellishment. It’s one of those venues where the beauty speaks for itself, and there’s no need to hide anything. Louise chose to keep the ceremony décor simple but romantic, with rose petal runners down the aisle and lanterns to add a soft, glowing atmosphere. After all, the more candles, the better!
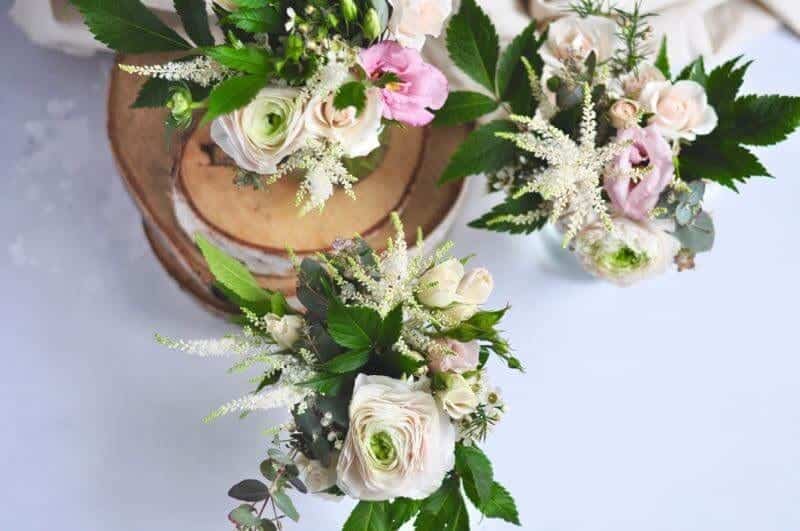
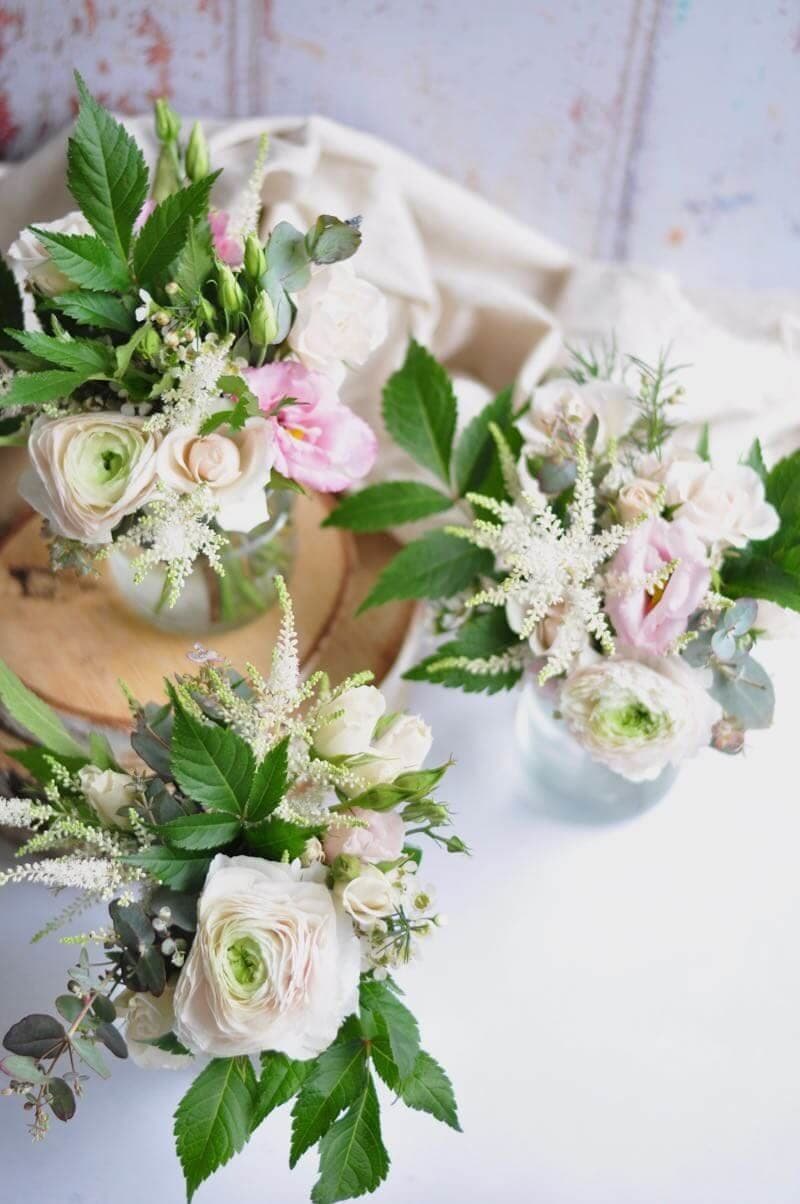
The tables were simple yet stunning. Five beautiful jars each held a small posy of flowers, and throughout the space, silver tea light holders added a little extra sparkle. Louise had the lovely idea of providing her own jars, which allowed the flowers to be given away as gifts to guests. It’s one of my favourite tips because it’s such a thoughtful gesture, allowing the flowers to be enjoyed even after the wedding day. Your guests will truly appreciate it, and it’s a lovely way to extend the beauty of the flowers beyond the celebration.
“I just want to say a massive THANK YOU for the absolutely stunning flowers you did for us on Saturday. I actually can’t get over how perfect they were! We had so many compliments on how beautiful they are. We’ve brought them all home with us and our house is filled with them, it makes me so happy to be surrounded by them. I’ll send you some pics when we get the official photos back, but it was just so wonderful, you and your team are incredibly talented and we can’t thank you enough!!!“
If you’re inspired by these timeless blush and white wedding flowers and want to create your own perfect floral vision, we’d love to help bring your dream to life. Whether you're envisioning something romantic and rustic, or a completely bespoke design, we specialise in creating beautiful, unique floral arrangements that perfectly complement your style and venue. Discover more about our bespoke wedding flowers and get in touch with us today to start planning your floral journey.
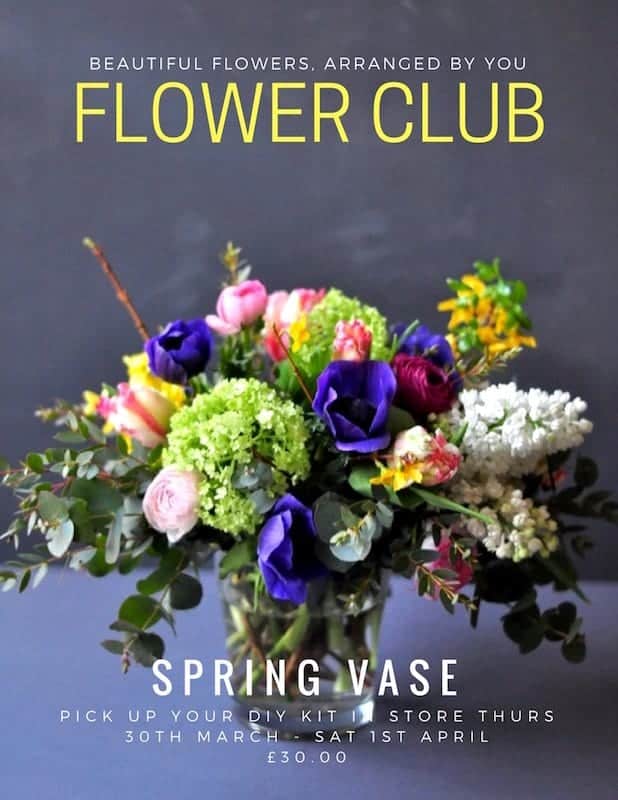
We are so totally excited about sharing this with you! We've been toying with the idea for a while so we hope you love it as much as we do! Every Monday we release a new Flower Club is designed to allow you to create DIY flower arrangements at home simply, with no effort (apart from putting by around 30 minutes of your time) You can dip in and out, so you're not stuck with a whole load of kits you don't have any interest in AND there's also a weekly flower-a-long where you can join us to see real-time how to make the arrangement.
This weeks arrangement is a Spring inspired vase with some of our favourites - lilac, anmeones, tulips, seasonal foliage, ranunculus, guelder rose and forsythia. Not to mention you get the vase to keep too! You get some written instructions to talk you through how to make the weekly arrangement and to keep for future reference.
Believe me when I say I could have easily spent the whole of Sunday filming and snapping the toing and froing of London's second most famous flower market. I'm used to heading off in the small wee hours to Covent Garden Flower Market, but haven't ventured up on a Sunday jaunt to Columbia Road Flower Market for some time. Its not that I haven't wanted to, its just time runs away!
For me Columbia Road has a lot more soul than Covent Garden, and although its not geared up towards florists, it really captures everything that I think a flower market should be about.
When I first visited Covent Garden, goodness, about 16 years ago I was expecting this mecca of creative hustle and bustle, bright lights, bright colours, independent retailers and amazing sights and sounds. A vibrant barter atmosphere! And it was in some respect like that, but it just felt a bit 'grey'. The building was old. It felt unloved. Whilst the produce you could buy and the traders are amazing, it didn't have the amazing mecca buzz I was expecting. Covent Garden have made huge improvements over the years and next month the new flower market opens. I cannot wait to visit, I hope the new building does all the amazing produce and retailers that they sell there justice.
Columbia Road on the other hand, had that buzz I was expecting. Perhaps its because its not the middle of the night when its open. Its amazing what a difference daylight makes to the whole experience! Columbia Road feels like a true market experience - the shouting, the crowds, the smells. The scattering of independent shops seling all manner of things lined on either side of the road.
If you love to buy flowers and don't fancy the early alarm clock of Covent Garden, I would totally urge you to take a Sunday out and head up to Columbia Road Flower Market.
https://youtu.be/_o5knxOegD4

Something I noticed since we filmed our very first flower tutorial for YouTube was just how much I say 'so'
Its funny how been put in-front of a camera and having to sit there and edit it makes you pick up on all those little quirks. Anyway, that's very much by the by ... we've been wanting to do some online flower tutorials for a while, and this is our very first proper attempt. we are learning as we go along, so please bare with bare with!
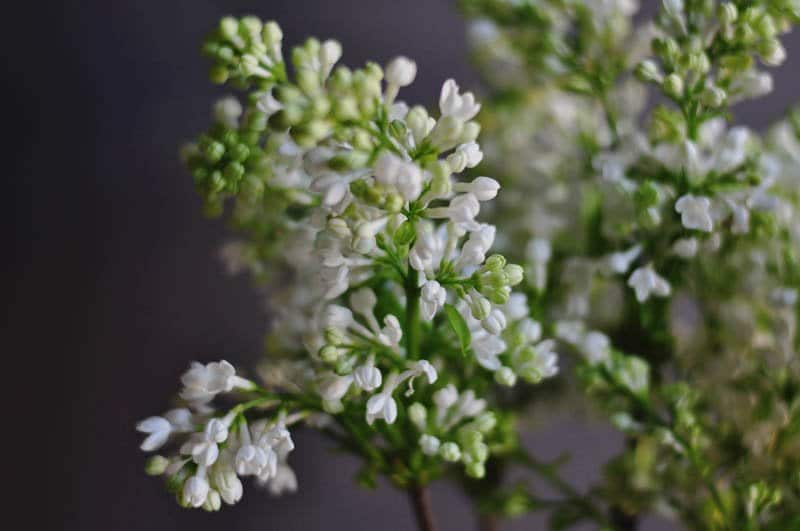
In our first DIY flower tutorial we're teaching you how to create a spring garden design for your table. I cannot tell you how amazing this looked (and smelt) when it was finished. There was a plethora of spring flowers - lilac, english narcissi, anemones, moss and some rather beautiful seasonal foliage.
In total this project took around 30 minutes, so its more than achievable to re-create at home and can be made a few days in advance of your gathering, so really there is no excuse not to have a go.
Despite the tweaks that we need to make to our filming (I know the lighting is more than rubbish) we really hope to inspire you to create your very own spring garden at home. If you attempt this DIY please show us your wares on our Facebook or Instagram accounts by tagging Green Parlour
https://youtu.be/4k8T8Hkypu0
Today is the first day I've really walked outside and thought 'SPRING!' There's a warmth in the air and that feeling that the days are once again getting longer. Today the shop feels like a euphony of spring with the most wonderful of scents and colours, so much so that I couldn't help but down tools and take some snaps of what we've got going on.
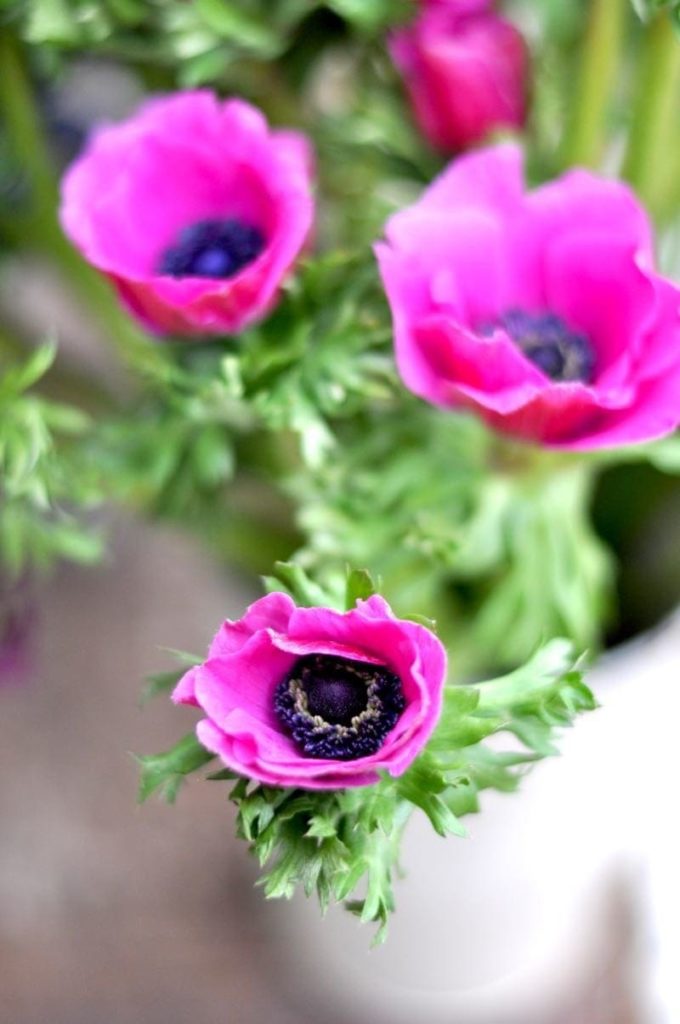
The anemones are totally stealing my heart at the moment, the brighter the better! The power of colour at this time of year is crucial - I think it sees us through the last few weeks of winter and makes us realise that spring really is on the horizon! Joy!
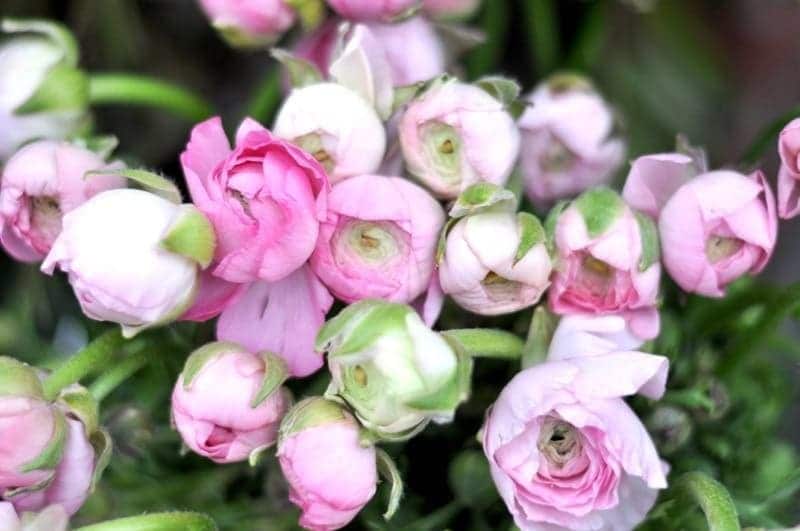
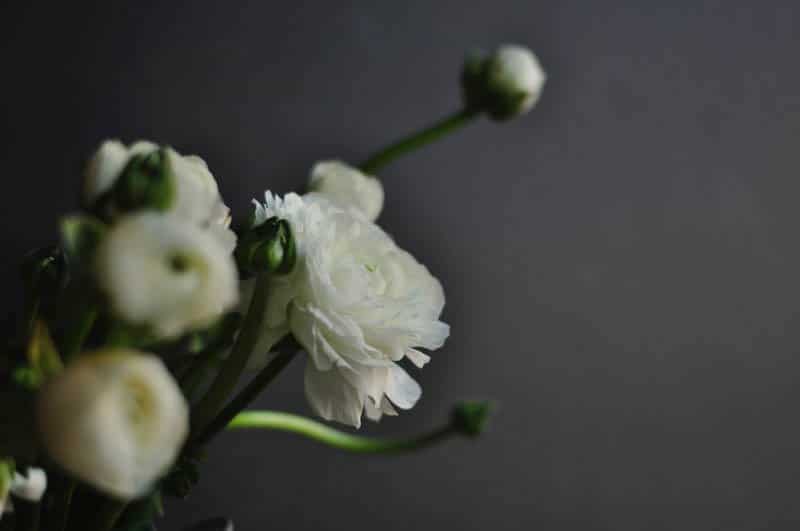
How darling are these pink ranunculus - the most perfet shade of baby pink and I'm always reminded of marshmallows when I look at them. They have the appearance of been such a delicate flower, but never before have I met such a fighter. These guys go on for weeks and can survive quite a time without water too. They are perfect for a spring flower crown at this time of year.
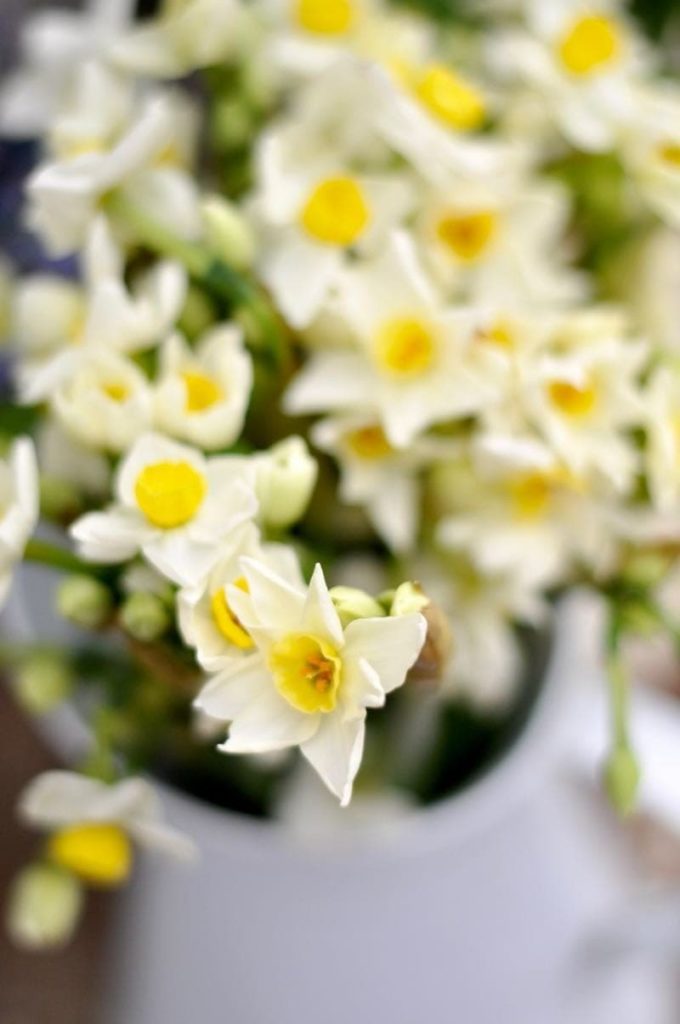
The English grown narcissi are now out and about. Intoxicating aromas and hundereds of different varieties. I have to say that there is something lovely about a daffodil, but if you really want to ramp up the flowers in your home, I'd urge you to ditch your daff bunches and just once in a while indulge in these wonderful narcissi. You wont regret it.
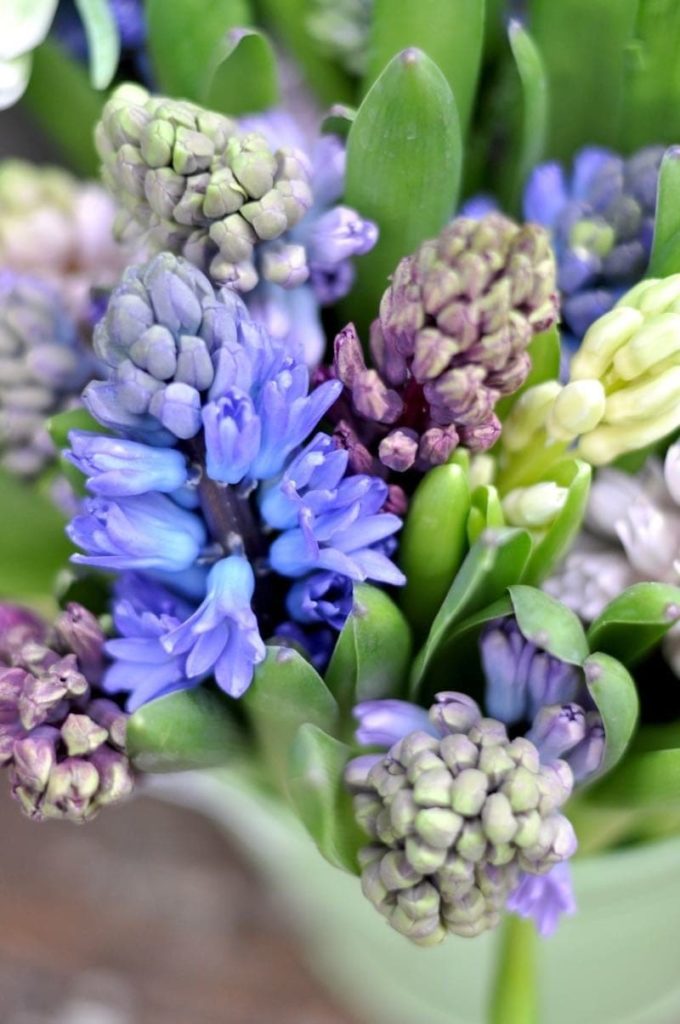
The stalwart of spring and one that never gets tiresome. Hyacinths are the most wonderful thing to grown on your windowsills and are a perfect cut flower as well as a plant. If you're into your heady scents, this is the chap for you.
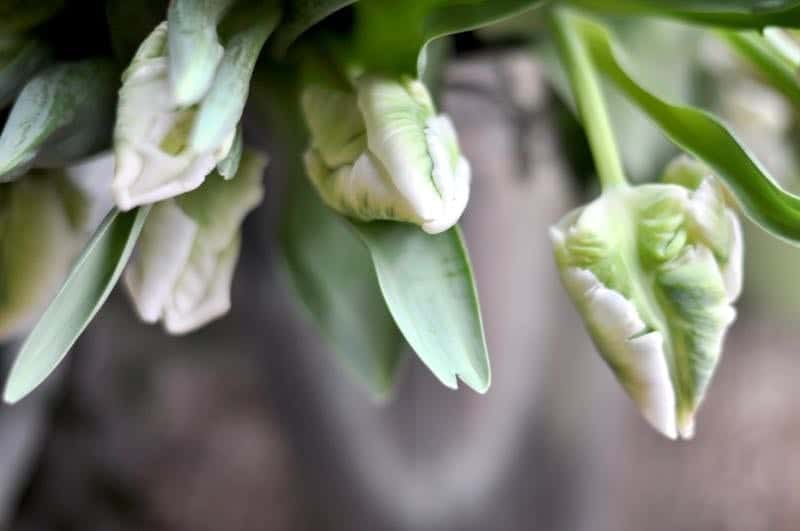
My all time favourite tulip, and that's quite something as there are SO many different varieties. This parrot has just the right amount of green speckled through its petals to keep things oh so fresh

The frost is in the air and as long as there are blue skies I'm happy. I sit and write this whilst trying to cajole the little guy to bed. My efforts, are however, wasted, and secretly I'm quite happy sitting by the fire just that little longer.
January. The month of fresh starts, resolutions, hunkering down and comfort food. On tonight's menu, pie - not the homemade version because today I've been flouncing around doing my flowery thing. January gets a bad rep for flowers, but I have to admit its one of my favourite times. The clear down after the decorations have gone leads to endless places to decorate with Spring bulbs and flowers. Little jars scattered on windowsills where once a garland or two sat. All those deep, rich colours swapped for fresh whites, a scattering of powder blue and pink.
The shop has been filled, re-stocked (just like my energy levels after our Christmas break) and is now a homage to spring. Ranunculus grace the flower stand, along with scented lilac, spring hyacinths and blush spray roses. Really you should come in for a sniff.
I'm busy behind the scenes, there's a lot on the cards which is all very exciting and all will be unveiled in due course.


